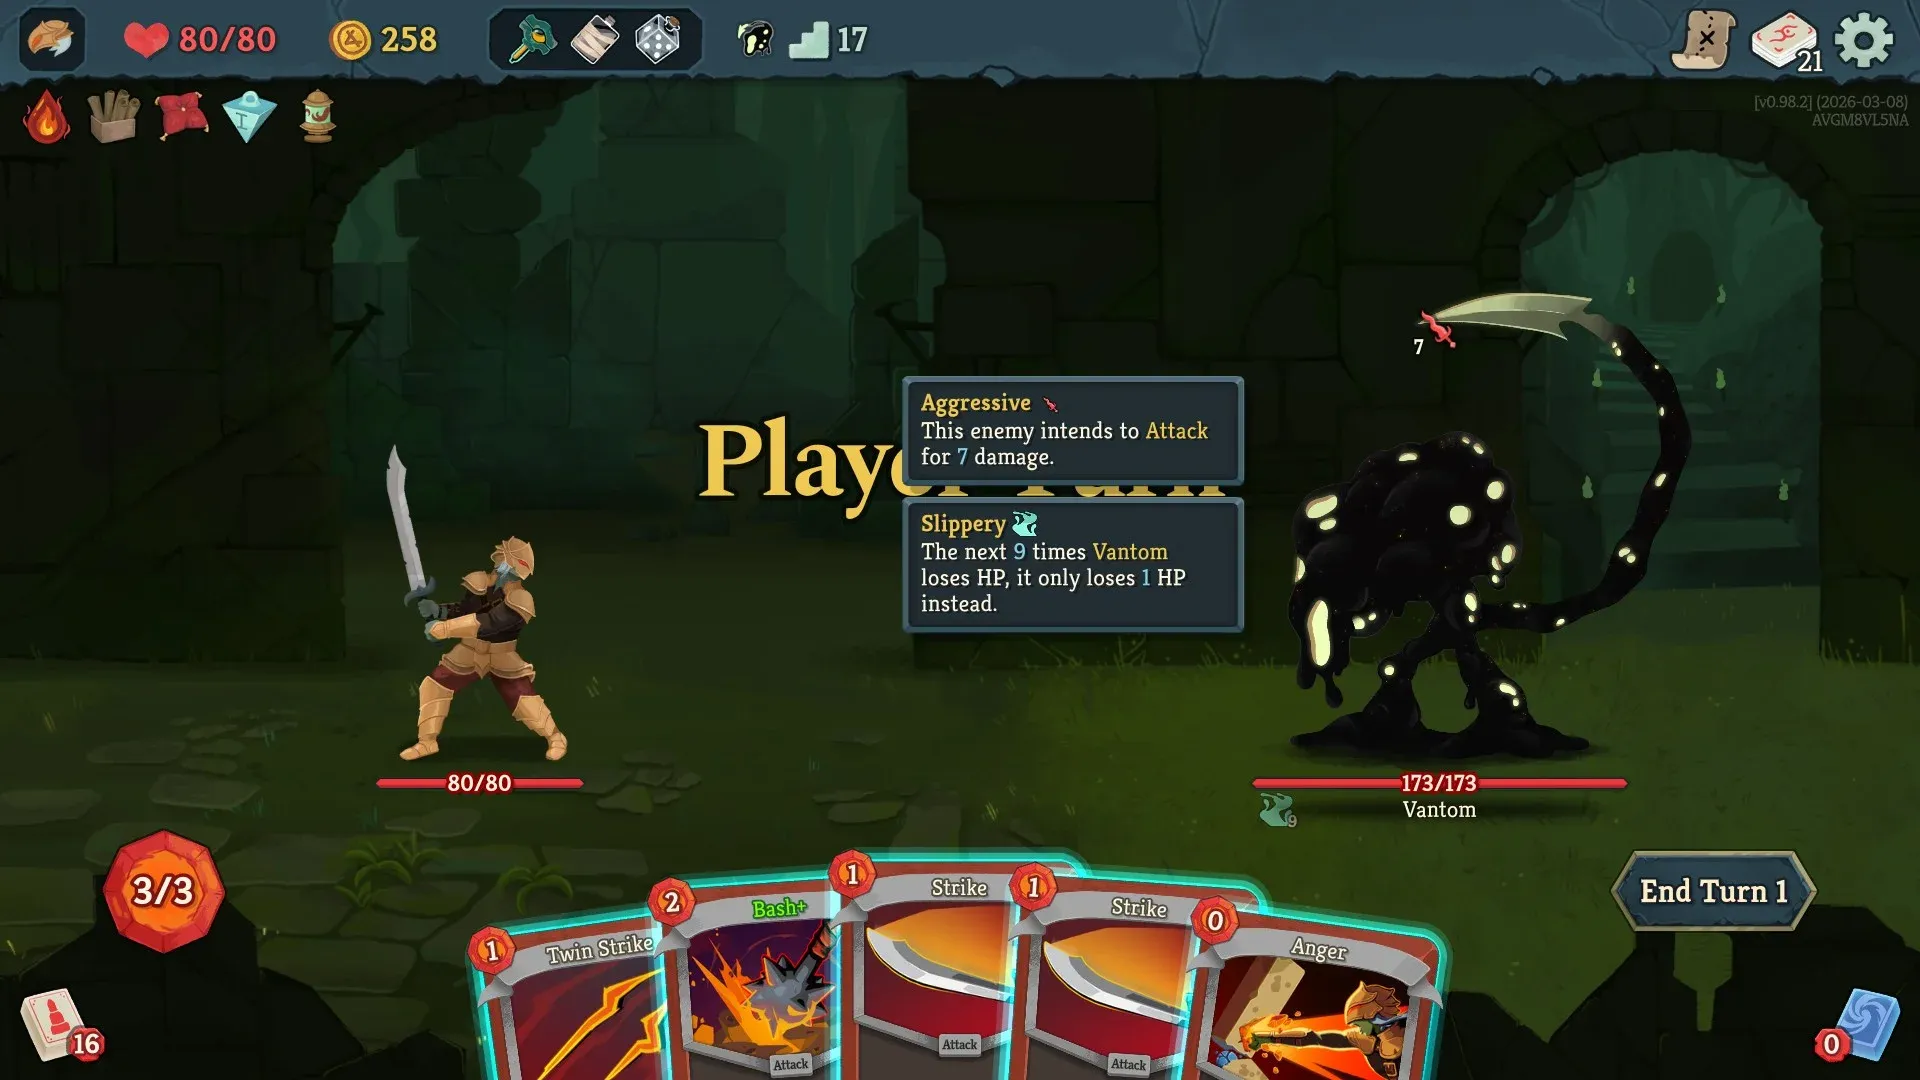
What Is Vantom's Slippery Mechanic?
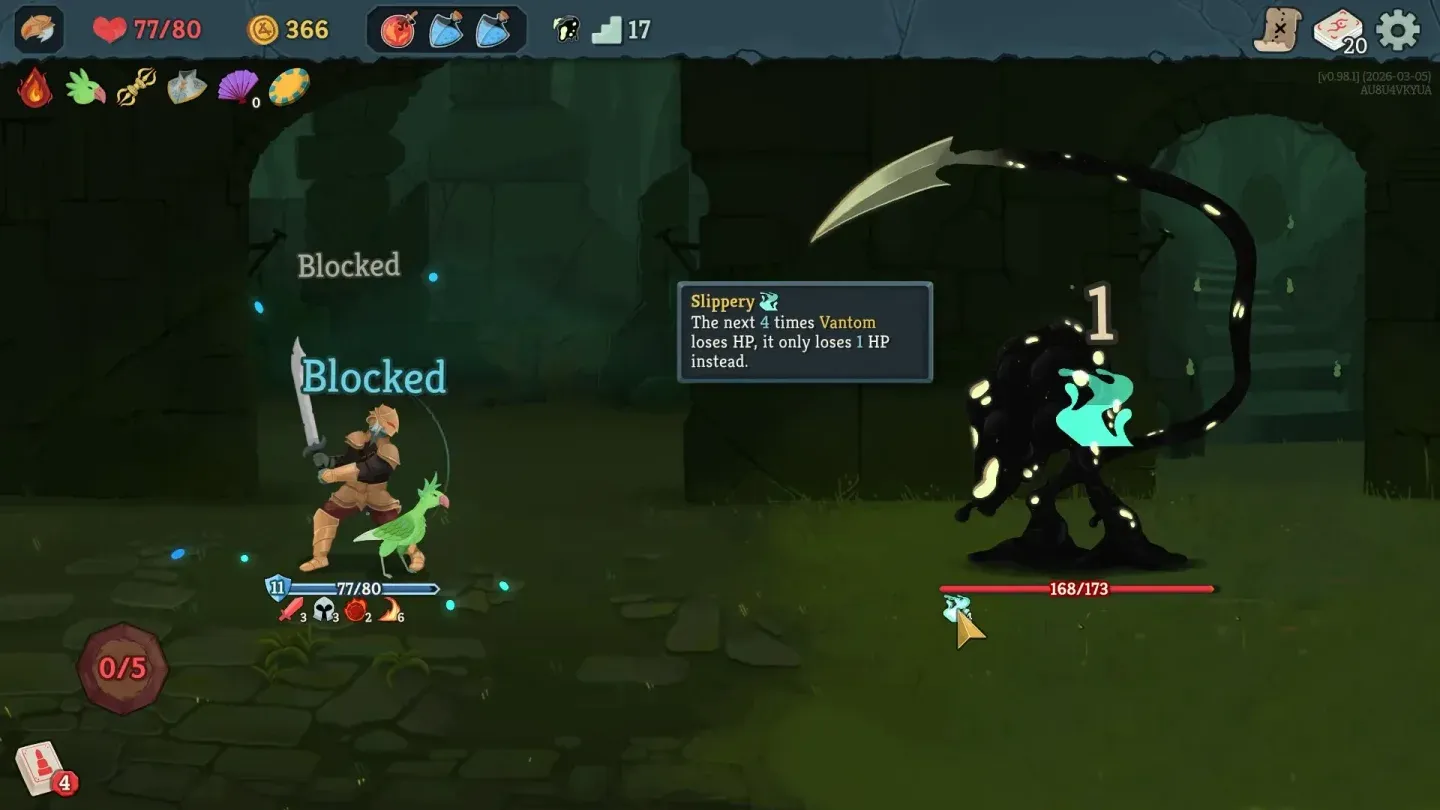
The core challenge of this encounter revolves entirely around the Slippery status effect. When the battle commences, Vantom enters with nine distinct layers of this condition active. As long as any of these layers persist, incoming damage is strictly capped at exactly one point of health loss, regardless of how powerful the assault might be. You cannot inflict meaningful harm until you have successfully exhausted all nine layers through repeated successful hits. This creates a specific hurdle for players who constructed aggressive, hard-hitting decks during previous encounters. Whether it is a standard twenty-damage strike or an enhanced relic attack, the result remains identical if Slippery is still present. Consequently, players often feel restricted when trying to apply maximum pressure immediately upon engaging. In multiplayer scenarios, the enemy's statistics adjust to accommodate the group size, increasing the difficulty slightly. However, the team also gains access to a greater volume of actions each round. Regardless of player count, the optimal approach remains consistent: prioritize the frequency of successful strikes over the magnitude of individual blows.
How to Strip Slippery Stacks Fast
To eliminate the Slippery condition efficiently, you must maximize the number of times you connect with the boss within a single turn. Since each contact removes one layer, cards that generate multiple hits are significantly superior to those dealing massive damage in isolation. For instance, Twin Strike delivers two separate impacts for a single energy investment, instantly reducing the stack count by two. Similarly, Whirlwind offers scalability based on available energy, allowing you to clear several layers rapidly if you invest enough resources. During the initial engagement window, prioritize playing low-cost attacks frequently to drain the stacks quickly. Your objective for the first few turns is purely attrition; do not reserve your most powerful abilities yet. Hold onto your high-cost finishers and complex combos until the immunity is fully broken. It is crucial to plan your deck composition beforehand. If you identify Vantom as the upcoming Act 1 boss, adjust your node selections to favor multi-hit mechanics or cheap attacks rather than relying on single-target heavy hitters. This preparation ensures you have the tools necessary to bypass the initial barrier effectively without wasting valuable turns.
What Are Vantom's Attack Patterns?
Vantom follows a predictable rhythm consisting of a repeating three-round sequence. Recognizing this pattern allows you to anticipate defensive needs before they occur. Every third round features the Tail Stab maneuver, which inflicts approximately twenty points of damage while forcing three Wound cards directly into your hand. These Wounds render cards unplayable, cluttering your draw pile and diminishing your operational capacity over time. This mechanic makes prolonged battles particularly dangerous for any build. Furthermore, following each stab, the boss permanently increases its Strength stat. Early in the match, attacks might deal seven damage, but they can escalate to thirty damage per turn as the fight progresses. You must avoid extending the combat beyond two or three iterations of this cycle. Accumulating wounds and strength buffs will eventually outpace most party compositions. Ideally, you should aim to conclude the entire battle within twelve rounds. If you are playing as the Ironclad, utilize cards such as Defend or Armaments to accumulate sufficient block during the second and third rounds of each cycle. While healing occurs between acts, preserving your current health pool is vital because the permanent card pollution from Wounds is harder to mitigate than temporary HP loss.
How to Beat Vantom Step by Step
Execute this encounter using a structured progression plan. During the opening turns, dedicate your energy solely to landing hits on Vantom. Utilize multi-strike abilities and inexpensive attacks to clear the Slippery layers rapidly. Ignore high-energy power plays until the status effect is removed. Pay close attention to visual cues; when the tail animation appears on the second turn of the first cycle, begin constructing defensive block immediately. You need roughly twenty block points to negate the incoming Tail Stab. Do not panic if you take damage; accepting the three resulting Wound cards is part of the plan. Once the immunity phases end, switch to offense mode. Deploy your strongest cards, potions, and expensive combinations now to secure the victory. Using a Weak Potion early can lower the damage output during the first cycle, giving you extra safety margin. Speed is critical once the slippery protection vanishes. Try to wrap up the fight within ten to twelve rounds to prevent excessive strength stacking. Additionally, consider equipping Attack Potions. They grant a free attack action without consuming energy, accelerating the removal of Slippery stacks while remaining useful later in the battle.
What Do You Get for Beating Vantom?
Upon successfully defeating this major obstacle, you will receive tangible benefits to aid your continued ascent. The primary loot includes one hundred gold pieces to spend at shops. More importantly, you gain the opportunity to select a new card to join your collection. This selection comes from three specific options classified as Legendary-tier rarity. Choosing wisely here can define the strength of your deck moving forward. Following the loot distribution, you will encounter Pael, an Ancient non-player character. Pael provides access to rare relics that offer significant advantages for the remainder of your journey. Collecting these items is essential before proceeding. Once you have secured your gold, card choice, and relic offerings, the adventure transitions into the next chapter. Act 2 officially commences under the designation "Hive." This new act introduces different challenges and enemies, requiring you to adapt your newly optimized build to survive further depths. Ensure you review your deck composition carefully after the reward screen to integrate any changes before entering the new biome.